Posts

Showing posts from March, 2011

Solution: Windows Live Error hr:0x80070643

This problems s eems to be something to do with (a) not having the messenger.msi file in the Installer folder and (b) perhaps not updating Windows Messenger first. This combination seem to fix the problem: 1. Make sure that there is a messenger.msi file in the C:\WINDOWS\Installer folder. 2. If it is not present use the 'Search' function of Windows by tapping F3 and search for the file on your Windows folder. 3. Copy the file into the C:\WINDOWS\Installer folder. 4. Fire up Windows Messenger and log in. 5. If there is a new version available, a message will prompt. Follow the onscreen instruction. 

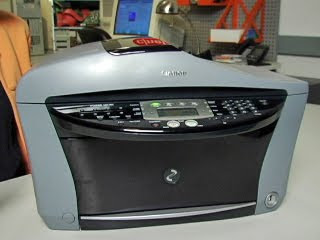
How to Reset Canon MP760 - Waste Ink Tank Reset Procedure

Problem with your Canon MP760 Waste Ink Tank? Just follow these steps on how to reset it. 1) Press the following keys in sequence: Copy-Menu-Scan-Copy-Scan. The display will say: SERVICE MODE #1 SSSW 2) Press the V key six times. The display will say: SERVICE MODE #7 PRINTER 3) Press OK. The display will say: #7 PRINTER #1 SSSW 4) Press the V key four times. The display will say: #7 PRINTER #5 INK ABS CAPA 5) Press OK. The display will say: SUCTION XX (where XX is how full the waste ink tank is as an integer percentage) 6) Change the XX to 0 by hitting the <> keys as many times as necessary (if you are closer to 99 than 0 it is better to hit the > key until it wraps around to 0). The display will say: SUCTION 0 7) Press OK. The display will momentarily say: SUCTION DATA ENTRY OK and then will quickly change to: #7 PRINTER #6 CDR ADJUST 8) Press the Stop/Reset button And the printer is back to normal.

How to Reset Canon MP780 - Waste Ink Tank Reset Procedure

1) Press the following keys in sequence: Copy-Menu-Scan-Copy-Scan. The display will say: SERVICE MODE #1 SSSW 2) Press the > key (also labeled +) six times. The display will say: SERVICE MODE #7 PRINTER 3) Press OK. The display will say: #7 PRINTER #1 SSSW 4) Press the > key (also labeled +) four times. The display will say: #7 PRINTER #5 INK ABS CAPA 5) Press OK. The display will say: SUCTION XX (where XX is how full the waste ink tank is as an integer percentage) 6) Change the XX to 0 by entering 0. The display will say: SUCTION 0 7) Press OK. The display will momentarily say: SUCTION DATA ENTRY OK and then will quickly change to: #7 PRINTER #6 CDR ADJUST 8) Press the Stop/Reset button And the printer is back to normal.

How to Disassemble Canon MP780/MP760 Printer to replace the Waste Ink Pads

Image
There are four different types of screws and you want to get them back where they came from. To help you keep the screws straight, I have labeled the photographs with letters corresponding to each screw type. Here are the screw types: A: medium length plastic screw. B: short machine screw with integrated washer. C: longer plastic screw with integrated washer. D: shorter plastic screw. Before you attempt this process, you should remove the cartridges, do a deep head cleaning followed by a nozzle check and repeat until nothing prints. Then remove the print head and unplug the printer with the carriage still in the center of the printer. You will need a medium Phillips screwdriver with a long shaft (at least five inches long). Start by removing the two side panels. First remove these two screws from the front of the printer: Canon MP 780 / MP 760 Disassembly Guide Remove these four screws from the rear of the printer: Now pry off the back of each side panel over the two

How To Repair Canon Pixma MP780 / MP760 / MP730 - Clogged Purge Unit

Image
1) Open the cover to get at the ink tanks and when the carriage comes to the center pull the power plug on the printer, then move the printhead more to the left. 2) Have a syringe ready or an eye dropper with some Windex-Original with Amomnia D. Use a flash light to see into the right side of the open area where you can reach the ink Caps. These are the small rectangular suction units where the printhead sets all the way to the right. When the carriage is Parked, these ink caps come up and cover the inkjet nozzles. There is one on the left for the black and one on the right for the color. 3) Add several drops of Windex to each cap until they appear flooded. The windex should begin to absorb through the Caps and down through the purge tubes to the waste ink pads. If it all goes in, add a couple of more drops. 4) Plug the power back in and turn the printer on. The carriage will move through a couple of cycles and you should hear the purge unit doing a couple o